XS650 Rear Brake Made Easy – DIY
Today I had a chance to finish a Batch of the DIY Rear Brake Pivots. I’ve been using these on several of the builds that I have been a part of, but never offered them to the public, until now….
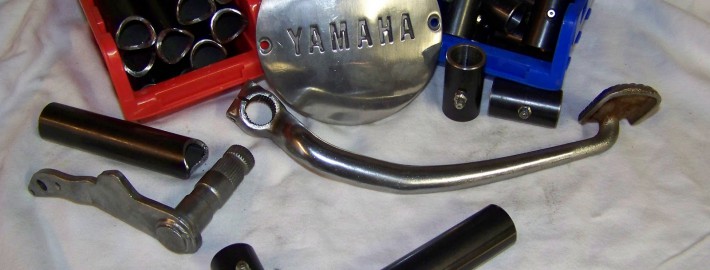
Machined from 1018 Steel, these Rear Brake mounts are a perfect fit for your stock Brake Lever and Pivot. The Machined Shell includes a Grease fitting, to keep your rear brake operating smoothly. None of the aftermarket Weld On Tail sections offer a brake mount, leaving it up to the owner or fab shop to come up with something that works. Now you can use these to simplify your build, and keep it clean.
Install is simple, find where you want to locate your brake lever on your frame, trim the supplied section of pre-notched tubing to the height you desire, notch the opposite end to fit the frame (if needed), and weld it all up.
Don’t want to keep the stock brake lever? Using Forward Controls?? This will still work great to actuate the rear break, just keep your stock pivot and all the hardware that attaches it to the rear drum, weld the pivot to your desired location and cut down the stock brake lever to attach to your forwards. On the cut down brake lever, you will drill a hole to attach the brake rods from the forward controls. (usually supplied with your Forwards)
You will receive 1 Machined Pivot, 1 Pre-Notched Mounting Tube, and 1 Grease Fitting. Everything else shown is for reference only.
Hopefully this will make some of your builds a little bit simpler.
As always, you can email me at Hugh’s HandBuilt if you have any questions, and you can purchase these right off of the website store


