The Devil in the Details – Tank Modifications
I’m building a bike using a “Stock” Mustang tank. An Ebay special that seemed to fit the build just fine. People ask me all the time about how to make their bike stand out, or how to make something just that much cleaner. Well, its the smallest of details that make the difference.
Take for example this filler neck. Originally these tanks were made from a left and right side Harley fuel tank set. So dual fillers would be ok in that application. BUT, this repop tank has a faux filler, and if you know me, you know that FAKE does not belong on a motorcycle. I don’t dig fake oil bags, and I don’t dig fake filler necks… You can send me all the hate mail you want, but the only thing fake that belongs on a Chopper should be a pair of 36DD’s on the pillion pad holding of for dear life. (Make sure your wife and/or girlfriend is ok with this beforehand, I take no responsibility for the actions of my readers)
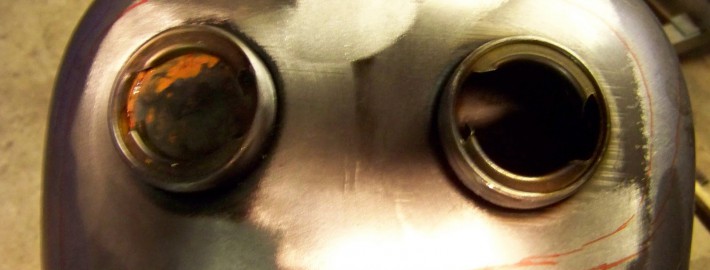
Stock “filler” necks. Fake one on the left, doesn’t even go anywhere.
Notice that the faux filler neck is already starting to rust, this would be a great place to hold moisture and cause problems in the future.
Once that was all done, I started on the bottom of the tank. These “Universal Chopper Gas Tanks” almost always have 3-4 petcock bungs. I was planning on using the 2 rearmost bungs, and needed to delete the others. Nothing says “Slacker” like a pipe plug stuffed into a bung you aren’t using. I know its common to do, but like I said, the Devil is in the Details…
I didn’t get any “before” pics, but I’m sure you guys know what the standard Harley Male Petcock Bung looks like. Ugly – Especially if you are just gonna put a pipe cap on it.
Remember when you use these “Universal Chopper Tank”s that Universal is something anybody can do, so make it yours, and make it better than you go it. And don’t forget to coat it inside before paint, you don’t want a pinhole leak to ruin that nice paint job you are gonna put on your ride… I only use RedKote tank liner, and you should too…


